Working with links can often be tedious and time-consuming. The “Blacklist” feature on LinkBuilder.com is designed to simplify and streamline this process. It helps you eliminate irrelevant sites and focus only on those that genuinely interest you.
Let’s dive into how the “Blacklist” works and explore some of the best use cases for it.
You can also watch a short video about this feature:
How the Blacklist Works
In your LinkBuilder.com account, you’ll find two key lists:
- Whitelist: This is your list of preferred platforms. Any sites you add here will always appear in your selection results.
- Blacklist (or “Used List”): This contains sites you’ve already used or platforms you don’t like for any reason. Links added to this list will be hidden from all search results.

By adding links to the blacklist, you’re essentially telling the system: “I don’t need these sites. Please remove them from my results.” The tool hides them, eliminating duplicates and unwanted platforms.
Let’s look at specific examples where this tool becomes an invaluable asset.
Example 1: Hiding Previously Purchased Links
This is the most common and practical use of the blacklist, especially for anyone involved in link building.
The Problem:
Imagine you or your team have already purchased numerous links. These are scattered across various projects, reports, and accounts. When starting a new round of link acquisition, you might accidentally select a site you already used months or even a year ago. You’ll waste time analyzing it, reaching out to the site owner with a new offer, and ultimately lose money.
How the Blacklist Solves It:
In your LinkBuilder.com account, there’s a section called “Used List,” which serves as your primary blacklist. To add links to it, follow these steps:
- Gather your existing links. You can do this in a few ways:
- Manually: Collect URLs from your old reports, spreadsheets, or emails into a single text file.
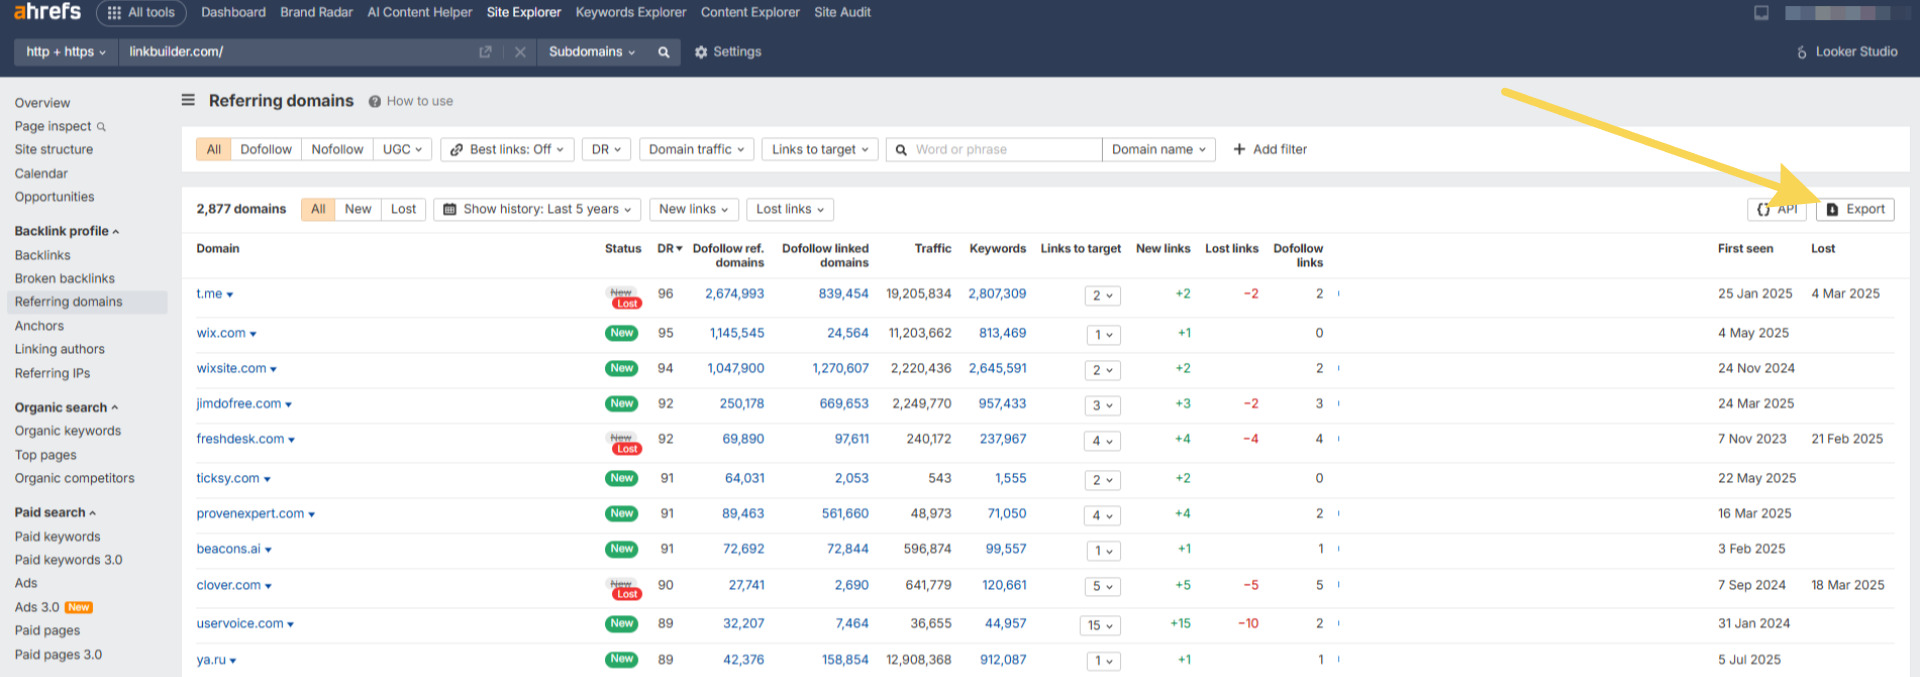
- Using analytics tools: Log into Ahrefs, Semrush, or a similar platform. Enter your website’s address, navigate to the “Referring Domains” section, and export the full list of domains linking to your site. This is the most accurate method, as it captures all your current links, including those you might have forgotten about.
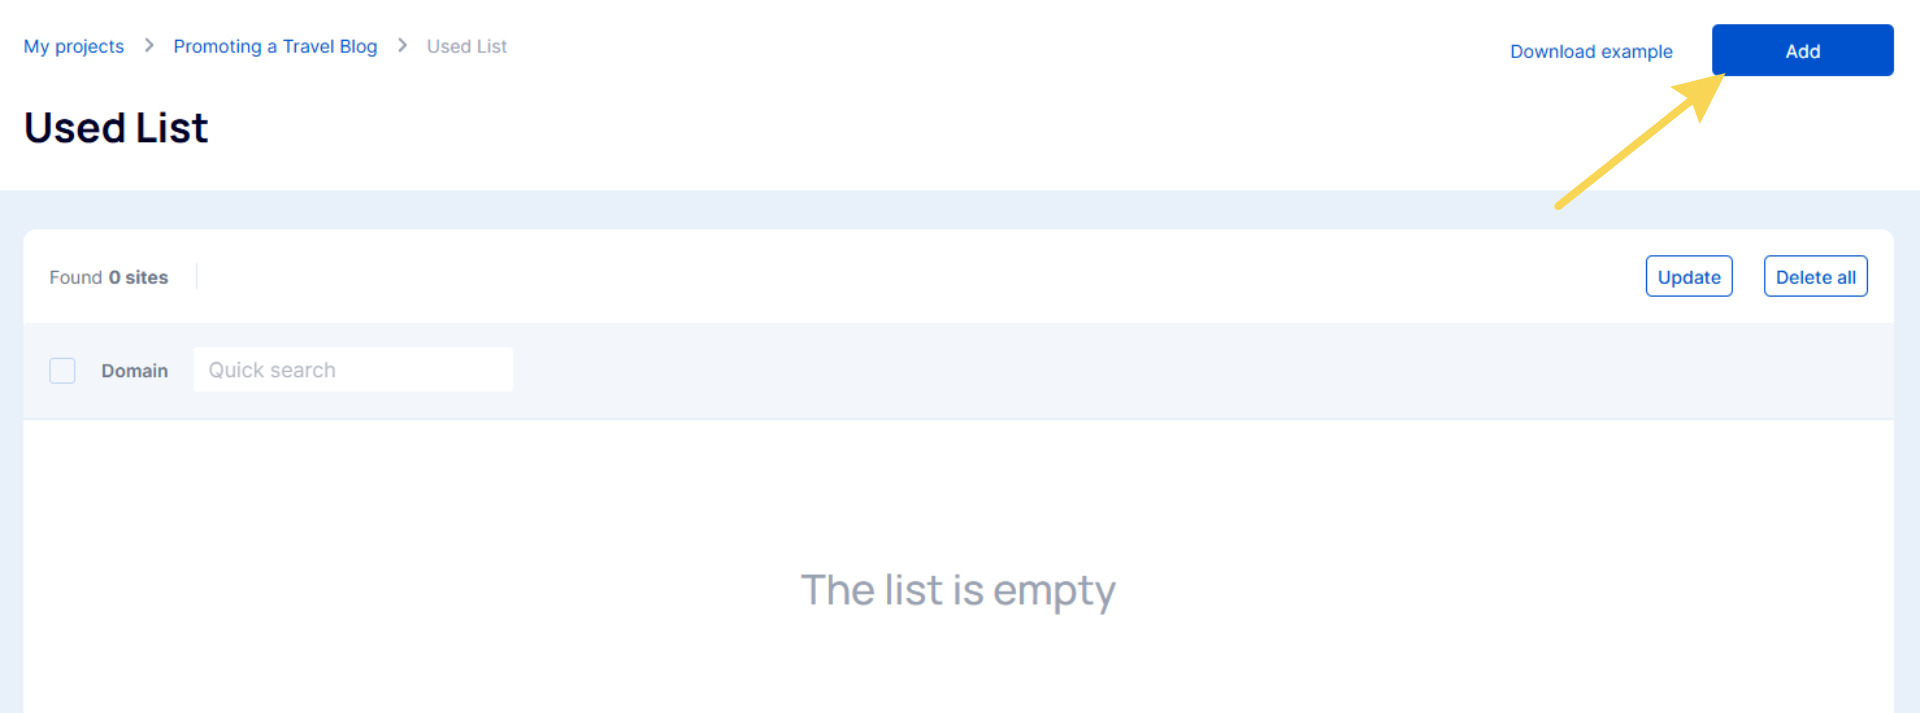
- Access your project on LinkBuilder.com. Go to the “Used” section, click on it, and select “Add” to include sites.
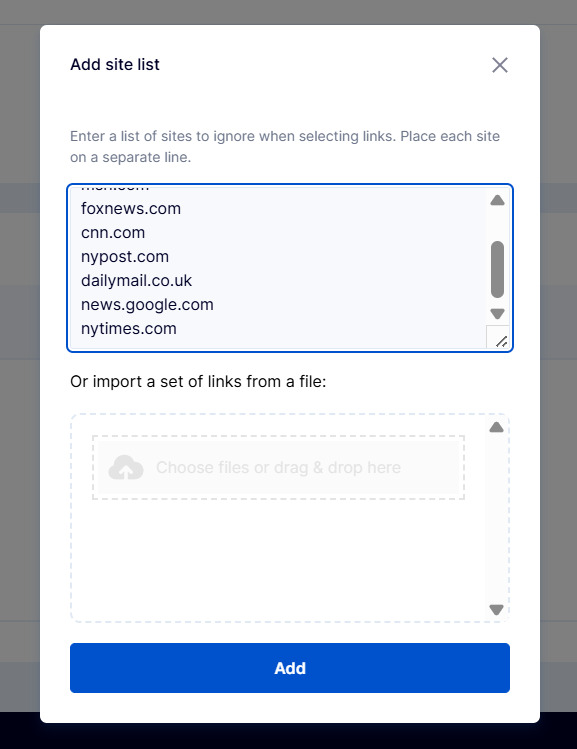
- Add sites to the list. You can either input them manually or upload a file. Simply include domain names, like site1.com or site2.co.uk. Click “Add” to save the list.
- Update the list. You’ll now see all the sites you’ve previously published on. If you want to bring a site back into your results, simply select it and remove it from the blacklist.
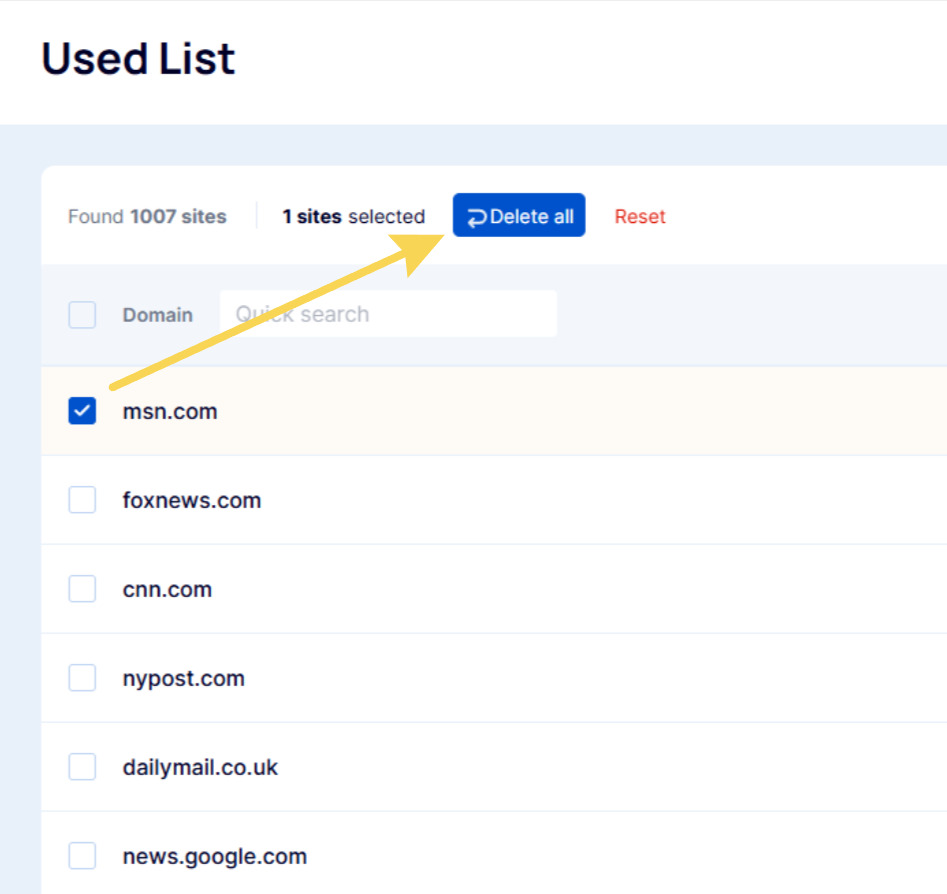
Once the blacklist is uploaded, the system scans your project’s filters. All domains you’ve added will disappear from your donor search results.
Example 2: Removing Unsuitable Sites During the Process
Even the best filters for traffic, price, or other metrics can’t always perfectly evaluate a site. Sometimes, human judgment is key.
The Problem:
You’ve set up filters, such as “theme: travel,” “country: USA,” and “price up to $1000.” The system returns a list of 1,491 sites. As you review them one by one, you notice a site that technically fits your criteria but:
- Has an outdated or unappealing design.
- Is overloaded with spammy-looking ads.
- Simply doesn’t feel right – and that’s reason enough.
You don’t want this site showing up in future searches.
How the Blacklist Solves It:
While browsing the donor list on LinkBuilder.com, you can hide an unwanted site in just two clicks. Here’s how:
- Create a filter and review the list of donors the system provides.
- Select a site that doesn’t suit your needs for any reason and check the box next to its domain.
- Click the “Hide” button. The site will instantly disappear from the results and be added to your blacklist.
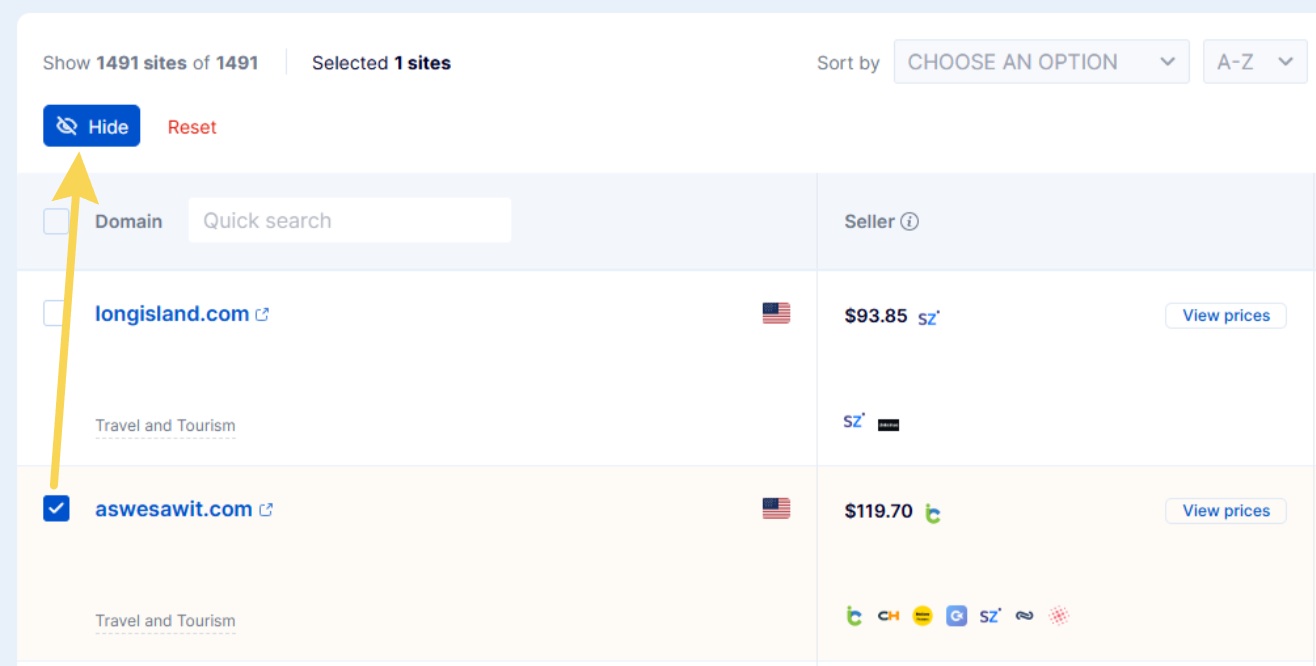
This way, you refine your selection in real time, keeping only the resources that work for you. Your blacklist grows based on your personal experience, making future searches more accurate and relevant.
Outcome: Creating a Clean Selection for Approval or Purchase
After uploading all your old links to the “Used List” and manually removing unwanted sites with the “Hide” button, you’re left with a clean list of sites that genuinely interest you and haven’t been used before.
What’s Next:
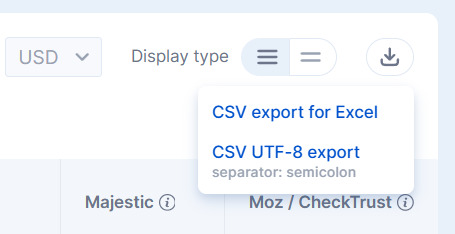
- Download the list. You can export your donor list as a CSV UTF-8 or Excel file. This file is ready to share with your boss or finance team for budget approval or to use for other purposes.
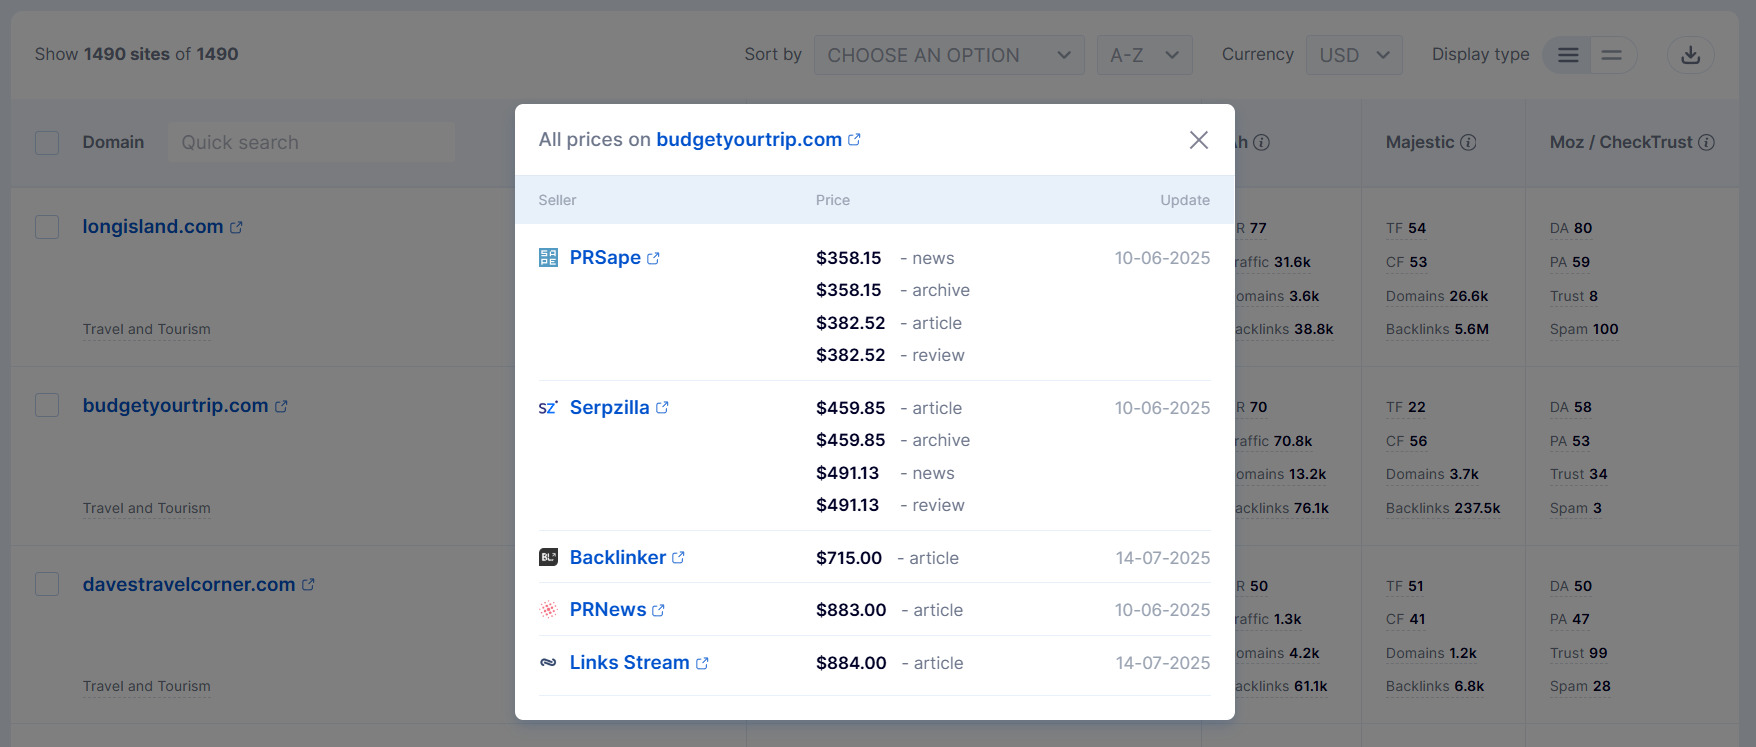
- Start purchasing. You can dive straight into buying through the platform without getting distracted by unsuitable options. Click “View Prices,” choose the best offer, and proceed to the exchange for purchase.
Conclusion
The blacklist on LinkBuilder.com isn’t just a button to hide a site. It’s a powerful tool for organizing your workflow that:
- Protects you from repurchasing the same links.
- Removes unwanted sites during manual filtering.
- Helps create a clean list of suitable donors.
Start by uploading your old links to the “Used List.” Then, use the “Hide” button as you work. You’ll immediately notice how much easier and more enjoyable finding donors becomes.
